Installing a Victron electrical system in a cruising sailboat demands careful planning. Weight must be kept low, space is severely limited, saltwater corrosion is a constant threat, and the system needs to be utterly reliable hundreds of miles from the nearest chandlery. This guide covers component selection and installation for a typical 35-45ft cruising yacht heading offshore or coastal cruising in UK and European waters.
12V or 24V: The Fundamental Decision
Most production sailboats under 40ft are wired for 12V. The majority of marine electronics — chart plotters, VHF radios, autopilots, navigation lights, anchor windlasses — run on 12V. Staying at 12V means compatibility with existing equipment and straightforward replacement of components.
For boats over 40ft, or any yacht planning heavy electrical loads (watermaker, electric winches, large refrigeration), 24V reduces current by half for the same power. This means thinner cables, less voltage drop over long runs from the stern locker to the mast, and more efficient inverter operation. See our 12V vs 24V marine guide for detailed comparison.
Dual-Voltage Systems
Many modern bluewater yachts use a 24V house bank with a Victron Orion-Tr 24/12 DC-DC converter to supply 12V for navigation instruments and standard marine equipment. This gives the efficiency benefits of 24V for the main battery bank while maintaining compatibility with 12V electronics.
Battery Location and Weight Distribution
On a sailboat, battery weight significantly affects performance and handling. Batteries should be mounted as low as possible and as close to the centre of the boat as practical. Common locations:
- Under the saloon sole — low, central, and accessible. The ideal location for the main house bank
- Engine compartment — good for the engine start battery and close to the alternator
- Quarter berth or aft locker — acceptable but adds weight to the stern, which can affect upwind performance
Lithium batteries (like the Victron Smart Lithium range) are roughly one-third the weight of equivalent lead-acid, which is a significant advantage on a sailing yacht where every kilogram matters. A 400Ah lithium bank weighs approximately 50kg compared to 130kg+ for equivalent AGM.
Solar Panel Installation on a Sailboat
Mounting Options
Sailboat solar is more constrained than on a motorboat or narrowboat. Common mounting positions:
- Stern arch or davit frame — the most common location. A well-designed arch can hold 2-4 rigid panels angled slightly for better output. Keeps panels clear of boom and sail shadow
- Bimini top — flexible or semi-flexible panels attached to the bimini canvas. Lower output than rigid panels but doesn't require structural metalwork
- Deck-mounted — flat panels on the cabin top or side decks. Prone to shadowing from the mast, boom, and rigging
MPPT Controller Selection
A Victron SmartSolar MPPT controller is essential for marine solar. For a typical cruising yacht with 400-600W of solar:
- SmartSolar MPPT 100/30 — handles up to 440W (12V) or 880W (24V) in a compact package
- SmartSolar MPPT 150/35 — for higher voltage strings where panels are in series on long cable runs from stern arch to the controller near the batteries
Running panels in series is generally preferable on sailboats: higher voltage means less current loss over the long cable run from the arch to below decks, and partial shading of one panel reduces the whole string's voltage rather than eliminating one panel entirely (as happens with parallel wiring and blocking diodes).
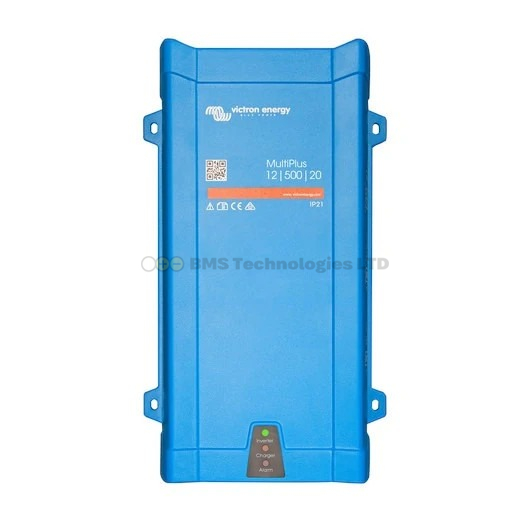
The MultiPlus: Shore Power and Inverter
A Victron MultiPlus is the heart of most cruising yacht electrical systems. It provides:
- Shore power charging — charges batteries when plugged into marina power
- Inverter — runs 230V appliances from the battery when sailing or anchored
- Automatic transfer switch — seamlessly switches between shore power and inverter
- PowerAssist — supplements limited shore power (common in Mediterranean marinas with weak supplies)
Sizing for a 35-45ft Cruising Yacht
| System Voltage | Recommended MultiPlus | Continuous Output | Charger Output |
|---|---|---|---|
| 12V | MultiPlus 12/2000/80 | 2000VA (1600W) | 80A |
| 12V (higher loads) | MultiPlus 12/3000/120 | 3000VA (2400W) | 120A |
| 24V | MultiPlus 24/2000/50 | 2000VA (1600W) | 50A |
| 24V (higher loads) | MultiPlus 24/3000/70 | 3000VA (2400W) | 70A |
For most 35-45ft cruising yachts, the MultiPlus 12/3000/120 (12V) or MultiPlus 24/3000/70 (24V) provides comfortable headroom for a microwave, kettle, or watermaker while offering strong charging capacity from shore power.
Isolation Transformer Considerations
If your yacht has a metal hull (steel or aluminium), an isolation transformer is strongly recommended to prevent galvanic corrosion through the shore power earth. Even fibreglass boats benefit if they have underwater metal fittings (propeller shaft, skin fittings, keel bolts) and are berthed in marinas with suspect earth connections.
Marine Bonding System
The Victron system's DC negative should be connected to the boat's bonding system (which connects all underwater metalwork). This is standard marine electrical practice and ensures the galvanic protection system (anodes) works correctly. The MultiPlus chassis ground terminal connects to the bonding system, providing a return path for the AC safety earth.
Corrosion Prevention
Saltwater environments destroy electrical connections rapidly. For a reliable installation:
- Use tinned copper cable throughout — standard bare copper will turn green within a season
- Apply adhesive-lined heat shrink on every crimp and lug
- Use marine-grade terminals (tinned, plated, or stainless steel)
- Apply corrosion-inhibiting spray (ACF-50 or similar) on terminal blocks and connections
- Mount electronics in dry, ventilated locations — avoid the bilge unless the device is IP67-rated
- Inspect all connections at the start and end of each sailing season
Recommended System for a 40ft Cruising Yacht (12V)
| Component | Product | Notes |
|---|---|---|
| Inverter/Charger | MultiPlus 12/3000/120 | Mounted in engine compartment or aft locker with ventilation |
| House Battery Bank | 3x Victron Lithium Smart 12.8V/200Ah | 600Ah total, ~55kg. Under saloon sole |
| Engine Start Battery | Separate AGM (non-Victron is fine) | Connected via Cyrix-Li-Charge for trickle charging from house bank |
| Solar Panels | 4x rigid panels on stern arch (500W total) | Two strings of two panels in series |
| MPPT Controller | SmartSolar MPPT 150/35 | Handles two series strings, high Voc for long cable runs |
| DC-DC Charger | Orion-Tr Smart 12/12-30 | Charges house bank from engine alternator, protects alternator with lithium bank |
| Battery Monitor | SmartShunt 500A | On house bank negative. Bluetooth to phone, data to Cerbo |
| GX Device | Cerbo GX + GX Touch 50 | Navigation station mount. Remote monitoring via VRM when away from the boat |
Installation Order
- Plan the layout — draw a full wiring diagram showing every component, cable size, and fuse. See our system design guide
- Install batteries — secure them in a ventilated battery box, as low as possible
- Mount the MultiPlus — needs ventilation, protection from spray, and short battery cable runs
- Run DC cabling — tinned copper, properly sized, fused at the battery end
- Install the MPPT and solar panels — MPPT near batteries, panel cables routed through deck glands
- Connect the Cerbo GX — last component, connects to everything via VE.Direct and VE.Bus
- Commission and test — check all charging sources, test inverter under load, verify shore power changeover
For battery monitoring specifics in a marine environment, see our boat battery monitor installation guide. For help understanding inverter ratings and sizing for marine loads, read our marine inverter ratings guide.