Choosing the right Victron SmartSolar MPPT charge controller is one of the most important decisions in any solar installation. Pick one that's too small and you'll clip your solar harvest. Pick one that's too large and you've wasted money. This guide walks you through exactly how to size a Victron MPPT for your solar panel array, covering voltage limits, current ratings, and real-world factors like temperature derating.
What Does an MPPT Charge Controller Do?
An MPPT (Maximum Power Point Tracking) charge controller sits between your solar panels and your battery bank. It converts the higher voltage output from your panels into the correct charging voltage for your batteries, while tracking the optimal power point as conditions change throughout the day.
Unlike simpler PWM controllers, an MPPT controller can harvest significantly more energy — typically 15–30% more — particularly in cold conditions or when panel voltage is much higher than battery voltage.
Understanding Victron MPPT Model Numbers
Every Victron MPPT model number follows the same format: XXX/YY, where:
- XXX = Maximum PV open-circuit voltage (Voc) the controller can handle
- YY = Maximum battery charge current in amps
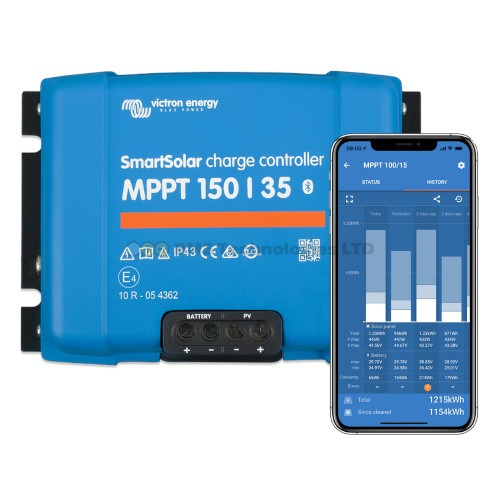
For example, a SmartSolar MPPT 150/35 accepts up to 150V from the solar panels and delivers up to 35A of charge current to the battery.
Victron makes three voltage classes:
| Voltage Class | Max PV Voc | Available Current Ratings |
|---|---|---|
| 75V | 75V | 10A, 15A |
| 100V | 100V | 15A, 20A, 30A, 50A |
| 150V | 150V | 35A, 45A, 60A, 70A, 85A, 100A |
| 250V | 250V | 60A, 70A, 85A, 100A |
Step 1: Calculate Your Maximum PV Open-Circuit Voltage
This is the most critical step. If your panels' combined open-circuit voltage (Voc) exceeds your controller's maximum, you will permanently damage the MPPT. Victron controllers have no overvoltage protection — they rely on you wiring the panels correctly.
Find Your Panel's Voc
Check the datasheet or label on the back of your solar panel. You need the Voc (Open Circuit Voltage) value. This is the voltage the panel produces when not connected to any load (e.g., in full sun with no battery attached).
A typical 12V-type panel (like a 100W panel) might have a Voc around 22V. A larger 24V-type panel (like a 300W panel) might have a Voc around 40V.
Panels in Series: Voltages Add Up
When you wire panels in series, their voltages add up. Three panels with Voc of 22.5V wired in series = 67.5V total Voc. This must be below your controller's maximum.
Account for Cold Weather
Solar panels produce higher voltage in cold temperatures. On a freezing morning, Voc can be 10–15% higher than the datasheet STC value (measured at 25°C). You must account for this.
The Victron MPPT calculator applies a temperature correction factor. As a rule of thumb:
- If your installation temperature can reach -10°C, add roughly 10% to the panel Voc
- At -20°C, add roughly 15%
- At -40°C, add roughly 20%
Example: Three panels with Voc = 22.5V in series = 67.5V. At -10°C, this becomes approximately 74V. A 75V controller is cutting it too close. You'd want a 100V controller for safety margin.
Step 2: Calculate Required Charge Current
The second number in the MPPT model is the maximum charge current. To work out what you need:
Maximum charge current = Total panel wattage ÷ Battery voltage
For a 12V system with 400W of solar: 400W ÷ 12V = 33.3A → you need at least a 35A controller.
For a 24V system with 400W of solar: 400W ÷ 24V = 16.7A → a 20A controller is sufficient.
This is why higher battery voltages let you use smaller (cheaper) controllers for the same panel wattage.
Step 3: Check the Maximum PV Wattage
Each Victron MPPT has a maximum recommended solar wattage based on your battery voltage. If you exceed this, the controller simply limits its output — it won't be damaged, but you'll waste the excess capacity.
Maximum Solar Wattage by Model (12V Battery)
| MPPT Model | Max Solar at 12V | Max Solar at 24V | Max Solar at 48V |
|---|---|---|---|
| 75/10 | 145W | 290W | — |
| 75/15 | 220W | 440W | — |
| 100/15 | 220W | 440W | — |
| 100/20 | 290W | 580W | — |
| 100/30 | 440W | 880W | — |
| 100/50 | 700W | 1400W | 2800W |
| 150/35 | 500W | 1000W | 2000W |
| 150/45 | 650W | 1300W | 2600W |
| 150/60 | 860W | 1720W | 3440W |
| 150/70 | 1000W | 2000W | 4000W |
| 150/85 | 1200W | 2400W | 4900W |
| 150/100 | 1450W | 2900W | 5800W |
| 250/60 | 860W | 1720W | 3440W |
| 250/70 | 1000W | 2000W | 4000W |
| 250/85 | 1200W | 2400W | 4900W |
| 250/100 | 1450W | 2900W | 5800W |
Step 4: Match Controller to Your System
Bring it all together with this process:
- List your panels: Note the Voc, Isc (short-circuit current), and Watt-peak for each panel.
- Decide on series or parallel wiring (see our series vs parallel guide).
- Calculate total Voc for your string configuration and apply the cold temperature correction.
- Choose a voltage class: Pick the controller voltage class that exceeds your corrected Voc with at least a 10% safety margin.
- Calculate charge current: Divide total panel watts by your battery voltage.
- Select the model: Choose the controller with an amperage rating equal to or above your calculated current.
Worked Example: Campervan with 2 × 200W Panels
Let's size an MPPT for a typical UK campervan build:
- Panels: 2 × 200W monocrystalline (Voc = 24.3V, Imp = 9.25A each)
- Battery: 12V lithium (LiFePO4)
- Location: UK (minimum temperature around -10°C)
Option A: Panels in Series
Voc = 24.3V × 2 = 48.6V. With cold correction at -10°C: 48.6V × 1.10 = 53.5V. This is well within a 75V controller.
Charge current: 400W ÷ 14.2V (typical lithium charge voltage) = 28.2A. You need at least a 30A controller.
But the 75/15 only handles 220W at 12V — not enough. There's no 75/30 model. So you'd need a SmartSolar MPPT 100/30 (handles 440W at 12V, up to 100V input).
Option B: Panels in Parallel
Voc = 24.3V (same as one panel). With cold correction: 24.3V × 1.10 = 26.7V. A 75V controller works fine.
But charge current doubles: 400W ÷ 14.2V = 28.2A. You still need a 30A controller, and the highest 75V model is 15A. So again, the SmartSolar MPPT 100/30 is the right choice.
In this example, either wiring configuration points to the same controller — the 100/30.
Using the Victron MPPT Calculator
Victron provides a free online MPPT sizing calculator on their website. Enter your panel details and location, and it tells you exactly which MPPT models are compatible. It automatically applies temperature derating based on your geographic location.
This is the quickest way to verify your manual calculations, and we recommend always double-checking your sizing with this tool before purchasing.
Common Sizing Mistakes
Mistake 1: Ignoring Cold Temperature Voc
The single most common error. If you're in Scotland and wire three 22V panels in series (66V total), a 75V MPPT seems fine. But on a -10°C January morning, your actual Voc could hit 73V — dangerously close to the limit and potentially destructive on colder days.
Mistake 2: Using Watt-Peak Instead of Voc for Voltage Sizing
Panel wattage tells you nothing about voltage. Two panels can both be 200W but have completely different Voc values. Always check the actual Voc on the datasheet.
Mistake 3: Oversizing the Controller for Future Expansion
Getting a controller with headroom for future panels is sensible. But buying a 150/100 for a single 200W panel means you've spent hundreds of pounds on capacity you may never use. Buy for what you'll realistically install within a year.
Mistake 4: Forgetting the Battery Voltage Matters
A 100/30 MPPT can handle 440W at 12V but 880W at 24V. If you're running a 24V system, the same controller handles double the solar capacity. Always check the wattage limit for your specific battery voltage.
SmartSolar vs BlueSolar: Does It Affect Sizing?
No. The SmartSolar and BlueSolar MPPT ranges have identical electrical specifications at each model size. A SmartSolar 100/30 and BlueSolar 100/30 handle the same voltage, current, and wattage. The difference is that SmartSolar includes built-in Bluetooth. Choose based on features, not sizing — see our SmartSolar vs BlueSolar comparison.
Quick Sizing Cheat Sheet
For the most common UK campervan and boat setups on 12V batteries:
| Solar Array | Recommended MPPT | Notes |
|---|---|---|
| 1 × 100W panel | SmartSolar 75/15 | Simple, budget setup |
| 1 × 200W panel | SmartSolar 100/20 | Most popular single panel choice |
| 2 × 200W panels | SmartSolar 100/30 | Best all-rounder for campervans |
| 3 × 200W panels | SmartSolar 150/45 | Large van or motorhome roof |
| 4 × 200W panels | SmartSolar 150/60 | Full roof array |
| 2 × 400W panels | SmartSolar 150/60 | Check Voc carefully — may need 250V class |
Summary
Sizing a Victron MPPT charge controller comes down to three checks: ensure your panel string Voc (with cold weather correction) stays below the controller's voltage limit, verify the charge current matches your total wattage divided by battery voltage, and confirm the controller's maximum wattage rating for your battery voltage isn't exceeded. Use the Victron MPPT calculator to verify, and always leave a safety margin on voltage.