Narrowboat roofs are ideal for solar panels — flat, long, and generally unobstructed. With 2-6 panels mounted along the roof, a narrowboat can generate enough solar power to significantly reduce reliance on the engine or shore power for battery charging. This guide covers everything from panel selection and mounting to cable routing and MPPT controller sizing, specific to the UK narrowboat environment.
How Much Solar Can a Narrowboat Carry?
A narrowboat roof is typically 1.8-2.0 metres wide (standard beam is 6'10" / 2.08m, but the usable flat roof area is narrower once you account for the gunwale edges). Length depends on your boat, but the usable section between the bow and stern decks is usually 60-80% of the total length.
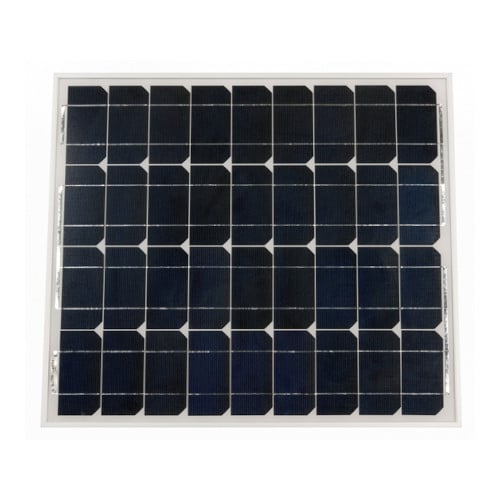
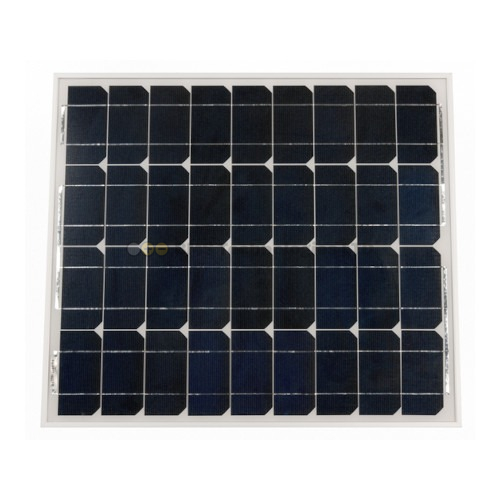
A standard rigid solar panel is approximately 1.0m x 1.7m (for a 175-200W panel). This means you can fit panels in a single row along the centreline. A typical narrowboat can accommodate:
| Boat Length | Usable Roof Length | Panels (approx) | Total Power |
|---|---|---|---|
| 30ft | 4-5m | 2x 175W | 350W |
| 40ft | 6-7m | 3x 175W | 525W |
| 50ft | 8-10m | 4-5x 175W | 700-875W |
| 57ft | 10-12m | 5-6x 175W | 875-1050W |
| 60ft+ | 12m+ | 6+ panels | 1050W+ |
These figures assume rigid panels mounted flat. You'll lose some space to obstructions — see below.
Rigid vs Flexible Panels on Narrowboat Roofs
Rigid Panels
Rigid glass-fronted panels are the default choice for narrowboats. They're more efficient, longer-lasting (25+ year lifespan), and cheaper per watt than flexible panels. Mounted on raised brackets, air circulates underneath, keeping them cooler and more efficient in summer.
The main downside is height: raised panels add 100-150mm to the roof profile. This is rarely an issue on canals (bridge clearances are generous for narrowboats), but check your route if you regularly use low bridges.
Flexible Panels
Flexible (semi-flexible) panels glue directly to the roof with essentially zero added height. They're lighter and don't create wind resistance. However, they have significant downsides:
- Shorter lifespan — typically 5-10 years before output degrades significantly
- Heat build-up — stuck directly to a metal roof with no air gap, they run hot and lose efficiency
- Lower output per square metre — typically 10-15% less than equivalent rigid panels
- Difficult to replace — adhesive removal is messy and can damage the paint
For most narrowboats, rigid panels on raised brackets are the better investment. Use flexible panels only if bridge clearance is a genuine concern on your regular cruising route.
Mounting Options
Z-Brackets
The simplest and most common method. Z-shaped aluminium brackets bolt to the panel frame and are screwed or bolted to the roof. They raise the panel approximately 50-80mm, providing some airflow underneath. Four brackets per panel — one at each corner.
Raised Rail Systems
Aluminium rails run along the roof with panels clamped on top. This raises panels 100-150mm, providing excellent ventilation. Rails can also be used to mount panels at a slight angle (5-10 degrees) to improve output and allow rain to wash dirt away. Rail systems cost more but make panel removal and replacement straightforward.
Fixing to the Roof
Narrowboat roofs are steel. You can weld mounting points, self-tap into the steel, or use through-bolts with backing plates. Whichever method:
- Seal every penetration with marine sealant (Sikaflex or similar)
- Prime and paint any exposed bare steel immediately to prevent rust
- Use stainless steel fixings — zinc-plated screws will rust within a season
Avoiding Shadow
Partial shading kills solar output. On a narrowboat roof, common shadow sources include:
- Chimney flue — the stove chimney casts a shadow that moves with the sun. Leave at least 1 metre between the chimney and the nearest panel
- Satellite dish or TV aerial — mount these at the bow or stern, away from the solar panels
- Hatch openings — cratch boards, pigeon boxes, and raised hatch covers all cast shadows. Plan panel positions around these
- Mooring lines and poles — less of an issue, but if you moor near trees, consider the tree shadow across your roof
- Other boats — in a marina, the boat next door's cabin may shade your panels. Not much you can do about this
If partial shading is unavoidable, consider wiring panels in parallel rather than series. With parallel wiring, a shaded panel only reduces its own output. In series, one shaded panel drags down the entire string. Alternatively, use a Victron MPPT controller with two separate tracker inputs or install two smaller MPPT controllers — one for panels in the shade zone and one for unshaded panels.
Cable Routing Through the Roof
Getting cables from the panels on the roof to the MPPT controller below decks requires a weatherproof penetration through the steel roof.
Waterproof Cable Glands
Use a marine-grade cable gland (IP68 rated) drilled through the roof. Steps:
- Drill the hole in a raised section of the roof (not in a water channel or low spot)
- De-burr the hole and apply rust-preventive primer to bare steel
- Fit the cable gland with a rubber gasket and marine sealant
- Run the solar cables through the gland and tighten to compress the seal around the cables
- Apply sealant around the outside of the gland as an extra precaution
Run a single gland per pair of cables (positive and negative). Label each cable at both ends.
Cable Selection
Use UV-resistant solar cable (H1Z2Z2-K) for the exposed section on the roof. Standard PVC-insulated cable degrades in sunlight within a few years. Below decks, standard tinned-copper marine cable is fine. Use MC4 connectors at the panels (these are standard on most solar panels) and terminate into junction boxes or directly to the MPPT controller below decks.
MPPT Controller Sizing
The Victron SmartSolar MPPT controller must be sized for both the total panel wattage and the open-circuit voltage (Voc) of the panel string.
Recommended Controllers by System Size
| Panel Setup | Total Watts | Configuration | Recommended MPPT |
|---|---|---|---|
| 2x 175W | 350W | 2 in series (12V system) | SmartSolar MPPT 100/20 |
| 3x 175W | 525W | 3 in series (12V system) | SmartSolar MPPT 150/35 |
| 4x 175W | 700W | 2 strings of 2 in series | SmartSolar MPPT 150/35 |
| 5x 175W | 875W | 2+3 split or all series (24V) | SmartSolar MPPT 150/45 |
| 6x 175W | 1050W | 2 strings of 3 in series | SmartSolar MPPT 250/60 |
Always check the Voc of your panels at minimum temperature (cold winter mornings produce higher voltage). The MPPT controller's maximum input voltage must exceed the total Voc of the series string. Victron's MPPT calculator on their website handles this calculation automatically.
Typical UK Solar Output on a Narrowboat
Expectations need to be realistic. The UK isn't the Mediterranean. Typical daily output from a 700W system:
- Summer (June-August): 3.0-4.0 kWh/day (250-330Ah at 12V)
- Spring/Autumn: 1.5-2.5 kWh/day (125-200Ah at 12V)
- Winter (December-February): 0.3-0.8 kWh/day (25-65Ah at 12V)
Solar alone is sufficient for summer liveaboard use on many narrowboats. In winter, you'll need engine running or shore power to keep the batteries charged. A combined approach — solar plus engine DC-DC charging plus occasional shore power — gives year-round reliability.
For the complete narrowboat electrical system guide, see our best Victron products for narrowboats. For MPPT controller details, read our MPPT solar charge controller guide. And for wiring best practices during installation, our wiring mistakes guide covers cable sizing, fusing, and routing in detail.