Adding solar to a caravan is one of the best upgrades you can make. Unlike a campervan conversion where you design the electrical system from scratch, a caravan typically has an existing mains charger and battery setup that you're adding solar to. This guide covers the specific considerations for caravan solar installations, from panel selection to integrating with your existing electrics.
How Caravan Electrics Differ from Campervans
Before diving into the solar installation, it's worth understanding what makes caravans different:
- Towed, not driven: There's no alternator charging while on the move (unless you install a dedicated charging wire from the tow vehicle, which many caravans have).
- Existing mains charger: Most caravans have a factory-fitted mains charger that works when plugged into shore power. You're supplementing this, not replacing it.
- Existing battery: Most caravans come with a single 12V leisure battery (often a cheap flooded or basic AGM type). Upgrading this is usually part of a solar installation project.
- Limited 12V loads: Factory caravan electrics are typically limited to lighting, water pump, and maybe a 12V socket. Fridges often run on gas or mains only.
- Roof construction: Caravan roofs are typically thinner and lighter than motorhome roofs. Mounting and waterproofing need extra care.
The Recommended Caravan Solar Setup
| Component | Recommendation | Est. Price |
|---|---|---|
| Solar Panel | 1 x 200W rigid monocrystalline | £100 – £180 |
| MPPT Controller | Victron SmartSolar 100/20 | £95 – £130 |
| Battery | 100Ah LiFePO4 (upgrade from existing) | £300 – £600 |
| Battery Monitor | Victron SmartShunt 500A | £55 – £80 |
| Mounting kit | Corner brackets or Z-brackets + adhesive | £30 – £60 |
| Cable entry gland | Waterproof roof gland | £10 – £20 |
| Cabling and fuses | 6mm2 solar cable, MC4 connectors, fuses | £30 – £60 |
Estimated total: £620 – £1,130
Step 1: Choose Your Solar Panel
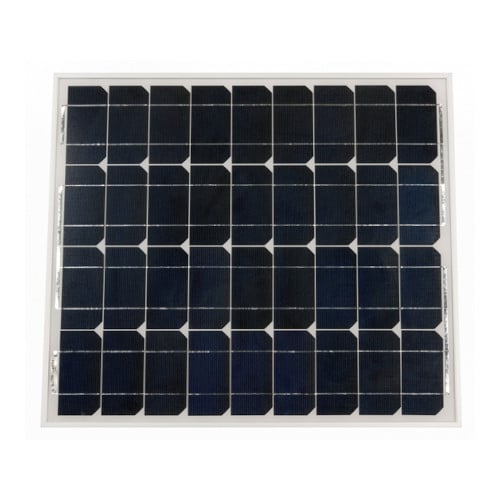
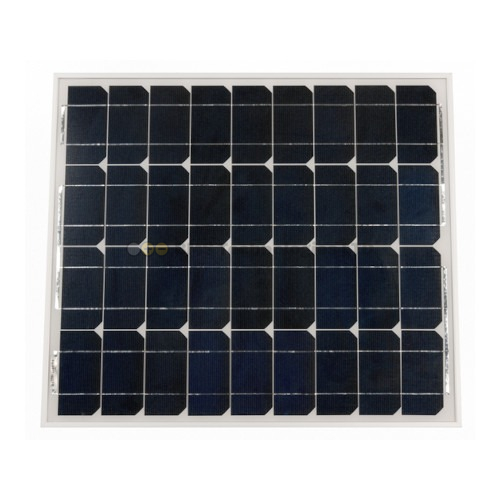
For most caravans, a single 200W rigid monocrystalline panel is the ideal starting point. It provides excellent output without taking up excessive roof space or adding too much weight.
Rigid vs Flexible Panels
| Factor | Rigid Panel | Flexible Panel |
|---|---|---|
| Efficiency | Higher (20–22%) | Lower (18–20%) |
| Lifespan | 25+ years | 5–10 years (degradation) |
| Weight (200W) | ~12kg | ~3–4kg |
| Height above roof | 40–80mm on brackets | Flush (bonded) |
| Ventilation | Good (air gap underneath) | Poor (no air gap) |
| Repairability | Easy to remove/replace | Difficult (bonded to roof) |
We recommend rigid panels for caravans. The air gap between the panel and the roof is important — it allows cooling airflow, which maintains panel efficiency. Flexible panels stuck directly to the roof run hotter and degrade faster. The weight difference (8–9kg) is negligible on a caravan chassis.
Panel Placement
Position the panel as centrally on the roof as possible, avoiding any existing roof furniture (TV aerials, roof lights, vents). Check for shading from air conditioning units, satellite dishes, or overhanging objects. Even partial shading on one cell of a panel can drastically reduce total output.
Step 2: Roof Mounting
Mounting solar panels to a caravan roof requires care to maintain the waterproof seal. The two main methods are:
Method A: Corner Brackets with Adhesive
This is the most common approach for caravans. Aluminium corner brackets are bonded to the roof with Sikaflex 252 or similar polyurethane adhesive. The panel sits in the brackets with rubber buffers to prevent vibration damage. No holes are drilled in the roof surface itself.
Advantages: No roof penetration for the mount points, strong bond, panels can be removed if needed.
Method B: Z-Brackets with Bolts
Z-brackets are bolted through the roof using stainless steel bolts with waterproof sealant. This provides an extremely secure mount but requires drilling holes in the roof, which must be sealed properly.
Advantages: Very secure, suitable for motorway speeds. Disadvantages: Holes in the roof that must be maintained and sealed.
Cable Entry
Regardless of mounting method, you need to get the solar cables from the roof panel down to the MPPT controller inside the caravan. Use a purpose-built waterproof cable entry gland (sometimes called a roof gland or cable box). These are designed for caravan and motorhome use — they seal around the cables and provide a low-profile, waterproof entry point.
Apply generous Sikaflex or Dicor lap sealant around the gland and check the seal annually. A leaking roof gland is the most common cause of water ingress in caravan solar installations.
Step 3: Install the MPPT Controller
The Victron SmartSolar 100/20 is ideal for a single-panel caravan setup. The 100V/20A rating provides ample headroom for a 200W panel on a 12V system, and the SmartSolar designation means it has built-in Bluetooth for monitoring and configuration via the VictronConnect app.
Why MPPT Not PWM?
MPPT (Maximum Power Point Tracking) controllers are more efficient than PWM controllers, especially when the panel's operating voltage is well above the battery voltage — which it always is with standard solar panels. An MPPT controller typically delivers 15–30% more energy than a PWM controller from the same panel. On a 200W panel, that's the equivalent of getting an extra 30–60W free.
Mounting Location
Mount the SmartSolar in a dry, ventilated location near the battery. Common locations in a caravan include inside the front locker, under a seat, or in the wardrobe area near the existing electrics. Keep the cable run from the controller to the battery as short as possible (under 2 metres if practical) to minimise voltage drop.
Step 4: Upgrade Your Battery
Most caravans come with a basic flooded lead-acid or budget AGM leisure battery, typically 85–110Ah. While solar will charge any battery, upgrading to a 100Ah LiFePO4 (lithium) battery transforms the system:
- Double the usable capacity: 100Ah lithium gives you 80–100Ah usable vs 40–55Ah from a 110Ah AGM (50% depth of discharge limit).
- Faster charging: Lithium accepts charge at a high rate right up to nearly full, so your solar charges the battery much faster.
- Longer lifespan: 3,000+ cycles vs 300–500 for AGM.
- Weight saving: Roughly 12kg for a 100Ah lithium vs 30kg for a 110Ah AGM.
When switching to lithium, configure the SmartSolar MPPT to use the lithium charge profile via VictronConnect. The default settings are for lead-acid batteries and will undercharge a lithium battery.
Step 5: Add a Battery Monitor
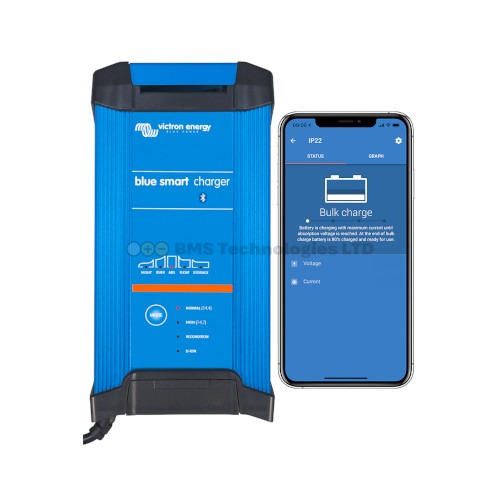
The Victron SmartShunt 500A is a small investment that provides accurate state of charge monitoring. Without it, you're guessing how much battery capacity remains. The SmartShunt connects via Bluetooth, so you can check your battery level from your phone — handy for keeping an eye on things from the awning.
Integration with Your Existing Mains Charger
Most caravans have a factory-fitted mains charger that operates when connected to shore power. You can keep this charger in place — it charges the battery when you're on hookup, and the solar charges when you're off-grid or between trips.
If you're upgrading to a lithium battery, check that your existing mains charger is lithium-compatible. Many older caravan chargers are basic trickle chargers designed for lead-acid batteries only. They may not charge a lithium battery fully (lithium requires 14.2–14.6V absorption), or worse, they may not have the correct termination profile.
If your existing charger isn't lithium-compatible, replace it with a Victron Blue Smart IP22. A 12/15 (1) model is perfect for a caravan — 15A of charge current from hookup, Bluetooth monitoring, and a proper lithium charge profile.
Wiring Overview
The wiring for a caravan solar installation is straightforward:
- Solar panel to MPPT controller: 6mm2 solar cable with MC4 connectors at the panel end, through the roof gland, to the PV input terminals on the SmartSolar. Include a DC isolator or in-line fuse on the positive cable between the panel and controller.
- MPPT controller to battery: 6mm2 or 10mm2 cable (depending on run length) from the controller's battery output terminals to the leisure battery via a 25A fuse.
- SmartShunt: Installed on the battery negative terminal. All negative connections go through the shunt so it can measure total current flow.
- Existing mains charger: Remains connected as before. If the charger connects to the battery positive, it goes to the positive busbar. The negative goes through the SmartShunt.
Expected Performance
A 200W panel with a SmartSolar MPPT in the UK can be expected to produce:
| Season | Daily Output (Wh) | Daily Output (Ah at 12V) |
|---|---|---|
| Summer (June–August) | 600–1,000 Wh | 50–83 Ah |
| Spring/Autumn | 300–600 Wh | 25–50 Ah |
| Winter (December–February) | 60–200 Wh | 5–17 Ah |
For a typical caravan with LED lighting, water pump, phone charging, and a 12V TV, daily consumption is 20–40Ah. A single 200W panel comfortably sustains this from April to October without needing hookup. Winter use will require supplementary charging from the mains charger on hookup.
For a broader understanding of how this fits into a larger system, see our complete electrical system guide. Use our price comparison tool to find the best UK prices on every Victron component mentioned in this guide.